Gold prospecting is the practice of choosing where to look for gold and then testing the ground carefully. If you’ve already spent time with a pan in your hands, you know how to separate gold from sediment. Prospecting is the layer underneath that—the strategy behind deciding where and how to pan so that you’re giving yourself the best chance of finding more than random flakes. For most hobbyists, it’s a mix of research, walking, sampling, and learning what to ignore and what to pursue.
Two Kinds of Gold Deposits (and Which One Matters to You)
Gold shows up in the ground in two broad ways. Placer deposits are gold that’s been released from its host rock by erosion, carried by water, and concentrated by gravity in rivers, streams, and ancient riverbeds. This is the gold you’re after with a pan, a sluice, or a metal detector. Lode deposits are gold still locked inside veins or rock—often quartz or chemically altered formations—and extracting it means chipping, crushing, and processing hard rock.
Most casual gold prospectors stick entirely to placer work, and that’s where this article stays focused. Hard-rock gold prospecting is something you can learn about much later, if you want to. It’s a different discipline with different tools and a steeper learning curve. Some hobbyists do eventually pick up a rock hammer and start examining quartz veins—chipping samples, crushing them, and panning the crushed material to see if anything shows up. That’s a legitimate form of small-scale lode gold prospecting, and it can be fascinating. But it’s not where you start. For now, rivers and creeks are your classroom.
A Simple Prospecting Workflow
Effective prospecting follows a step-wise pattern, even at a small scale. You don’t need to discover a brand-new goldfield. You just need to focus on a region where gold has already been found and then narrow in. Think of it as a long-term experiment, not a race. The prospectors who find gold consistently are the ones who approach each outing with a plan and pay attention to what the ground is telling them.
Choose a promising area. Look for watersheds with known gold—historic gold-rush areas, rivers that have produced placer gold, drainages downstream of old lode mines. Public land where gold panning is allowed (BLM, National Forest, state-managed areas) is your starting point. Local gold prospecting clubs are one of the fastest ways to learn which districts are still worth exploring. State-level recreational panning guides, often available as free PDFs from geological survey offices, are another. Between the two, you can build a short list of candidate areas without spending a dollar on gas.
Sample systematically. On your first visit to a new area, treat the entire outing as a sampling trip. Pan in ten to twenty different spots along the creek, even if you find gold at the first one. You’re trying to learn where the stream concentrates material—inside bends, behind large boulders, along bedrock ledges, at the tail end of gravel bars. If a spot looks promising, gather a few buckets, classify the material, and pan or sluice it more carefully. Resist the urge to dig in at the first sign of color. The goal is to learn which parts of the river actually hold gold, not to pan every square inch on your first day.
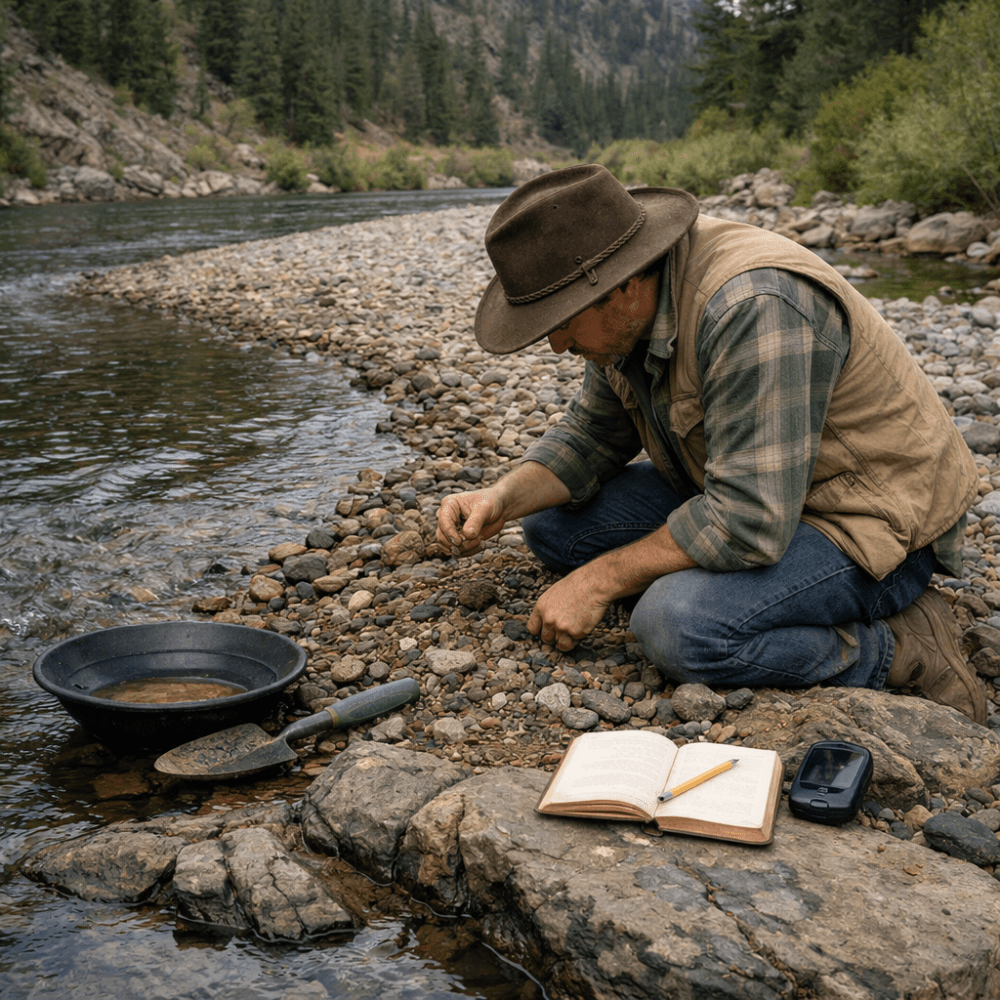
Track your results. This is the step most beginners skip, and it’s the one that separates prospecting from casual panning. Keep a notebook or use a GPS app to log where you panned, what you found (even if it’s nothing), how deep you dug, and what the surrounding geology looked like. Note distance from the main current, depth to bedrock if you reached it, and any crevices you cleaned out. You’re not just collecting gold—you’re collecting data about the river. That makes every visit useful, even when you come home with almost nothing in the vial.
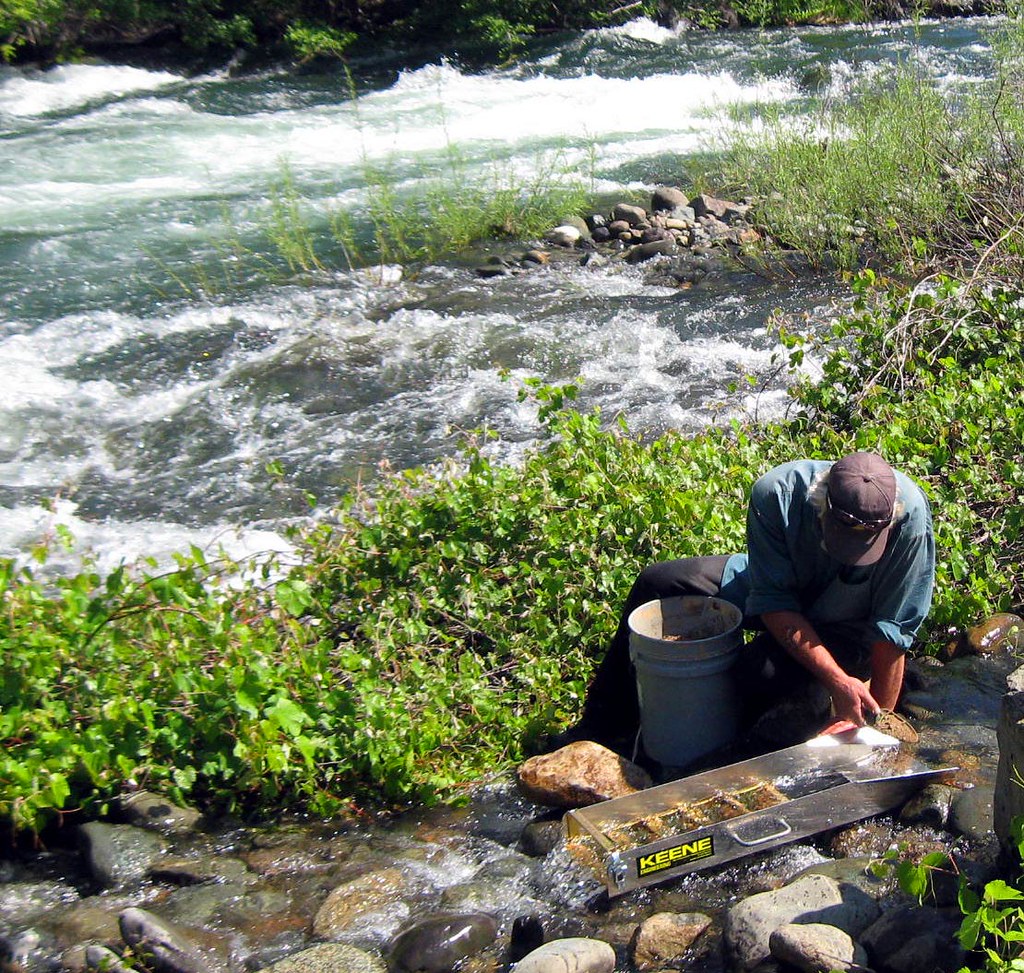
Image courtesy of moonjazz.
Common Gold Prospecting Methods
Hand panning is where almost everyone starts, and it’s enough on its own for years of serious gold prospecting. A pan lets you test a spot in minutes with no setup and no equipment to haul. It’s the tool you’ll keep using no matter what else you add later.
Sluicing uses flowing water and a box fitted with riffles to process larger volumes of material than a pan can handle. It’s a natural next step once you’ve identified a productive stretch of creek, but sluice use is regulated in many areas—check before you set one up.
Metal detecting is a different angle entirely. Gold-specific detectors can find nuggets and shallow pieces in gravel bars, benches, and old mining areas where previous prospectors left gold behind because they didn’t have the technology to find it. Modern units handle mineralized ground better than general-purpose detectors, but they come with a learning curve and a higher price tag. Detecting pairs well with panning: you can detect a bench or bar, then pan the material around any signal to confirm what’s there.
You can spend years prospecting with nothing but a pan, boots, and a notebook and still be doing serious work. Larger equipment is optional, not required.
Starter Gear
A gold pan, a classifier, a small shovel or trowel, a bucket, and a water container are the essentials. Add a magnifying loupe for examining fine material, a snuffer bottle or tweezers for picking up small gold, a glass vial for storage, gloves, sturdy non-slip boots, and basic sun protection. That’s a complete gold prospecting kit for well under a hundred dollars! Finding a single gram of gold will pay it all back in full, with change!
Down the road, some hobbyists add a portable sluice, a handheld high-banker, or a metal detector. Each of those tools brings additional capability but also additional legal and environmental considerations depending on where you use them. The right time to add gear is after you’ve learned what your local rivers actually allow and what kind of prospecting you enjoy—not before.
Safety and Common Mistakes
Waterways deserve respect. Avoid unstable banks—they can collapse without warning, especially where soil is undercut by seasonal flooding. Watch for cold water, slippery rocks, and changing currents, particularly during spring runoff when streams that looked gentle a week ago can turn fast and deep. Wear footwear with real grip and bring layers even on warm days; streamside temperatures drop faster than you’d expect once the sun moves.
The most common beginner mistake is panning only on the surface and ignoring bedrock and crevices, which is where gold concentrates most heavily. The second is locking onto a single spot too early, before sampling the broader area. The third is buying too much gear before knowing whether you enjoy the activity or what your local regulations allow.
If you find yourself wondering whether you need a dredge, a power sluice, or a truckload of tools, the answer is usually: not yet. Take a step back, sample more, and ask yourself what you’re really trying to achieve.
Start Gold Prospecting Yourself
Pick a watershed within driving distance that has a history of placer gold. Check land status, check for active claims on the stretch you want to work, and plan a half-day sampling trip. Bring your pan, your classifier, a trowel, a notebook, and a vial. Pan ten to twenty spots. Write down what you find and where. That single outing will teach you more about prospecting than any amount of reading, and it gives you a real foundation to build on—whether you decide to keep it simple or eventually add new tools to your kit.
You can spend years prospecting with nothing more than your pan and a notebook. If you ever decide to try sluicing, metal detecting, or other methods, those are optional chapters—not required steps.
Thomas Holt • Geologist, Prospector, Writer